
Build & Publish Android Apps with Python
Complete Kivy & KivyMD Tutorial
Go from zero to published app on Google Play Store. Step-by-step guide to creating, testing, and monetizing your Python mobile applications.
Introduction
Why Python for Mobile Apps?
Python has become an accessible option for mobile development, especially for developers new to the field. Many experienced programmers also leverage Python's capabilities for rapid prototyping and development.
Frontend & Backend
Python offers robust libraries covering both graphical user interfaces (GUI/frontend) and application logic (backend), making it a complete solution for app development.
Why Kivy?
Among Python GUI frameworks like PyQt and Tkinter, Kivy stands out for mobile development with its cross-platform capabilities and powerful packaging tools.
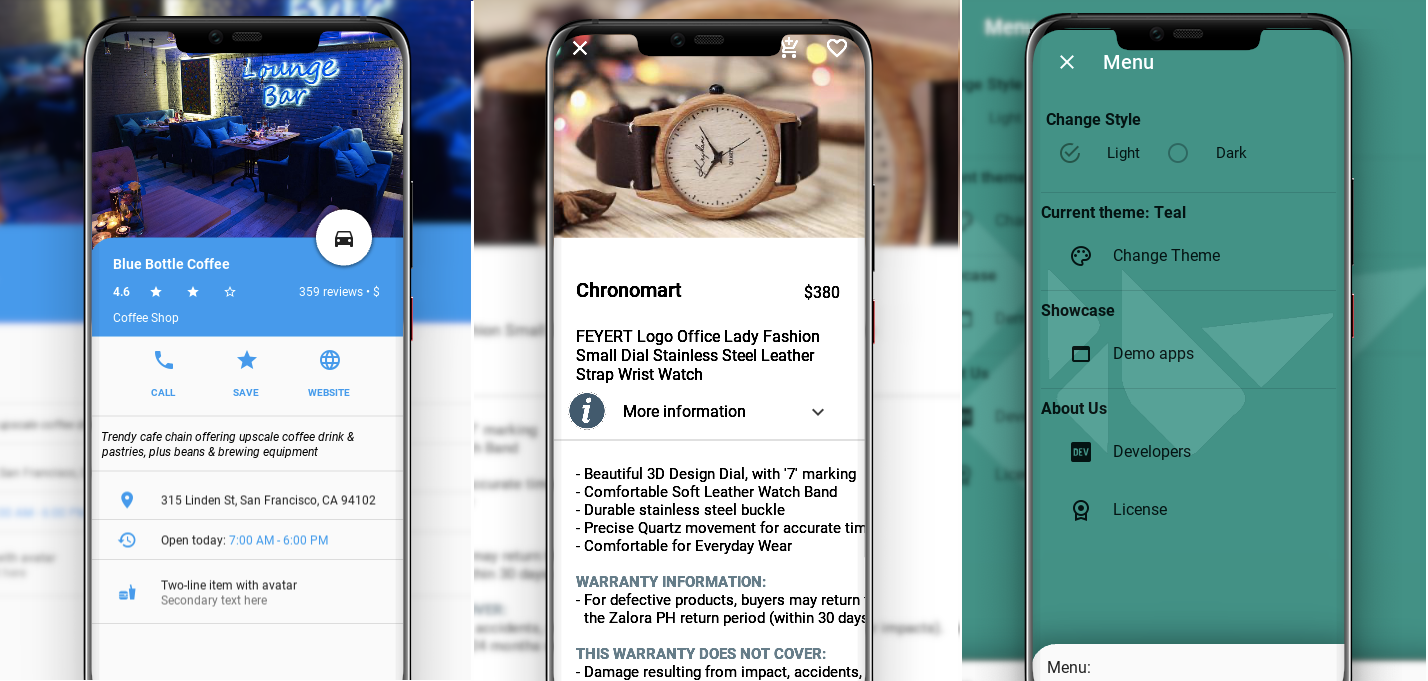
Our Published Apps

We have successfully released two Android apps on the Google Play Store, both developed with Kivy and KivyMD. Explore them to see what these libraries can achieve.
Kivy and KivyMD
Kivy
Kivy is a free and open-source Python framework for developing mobile apps and multitouch applications with a natural user interface (NUI). It is beginner-friendly but does require basic Python knowledge.
Recommended Learning Path:
While Kivy provides the foundation for app development, its default graphics can feel limited in terms of user experience. That’s where KivyMD comes into play.
KivyMD
KivyMD is a community-driven project that extends Kivy with Google's Material Design components, creating modern, user-friendly, and visually appealing interfaces.
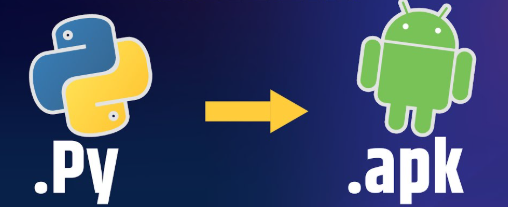
Convert your Kivy script into an APK
As you will learn when going through either Kivy or KivyMD, there are two ways to develop with those libraries: the declarative KV style, where the frontend is handled by a .kv file and the backend by main.py, or the declarative Python style where everything is handled in main.py.
Kivy/KivyMD: Declarative kv Style
from kivy.app import App
from kivy.uix.boxlayout import BoxLayout

class RootWidget(BoxLayout):
    pass

class MyApp(App):
    def build(self):
        return RootWidget()

if __name__ == '__main__':
    MyApp().run()
The corresponding .kv file defining the UI:
<RootWidget>:
ScrollView:
	GridLayout:
		cols: 1
		size_hint_y: None
		height: self.minimum_height
		Label:
			text: "Item 1"
			size_hint_y: None
			height: 40
		Label:
			text: "Item 2"
			size_hint_y: None
			height: 40
		Label:
			text: "Item 3"
			size_hint_y: None
			height: 40
Kivy/KivyMD: Declarative Python Style
from kivy.app import App
from kivy.uix.scrollview import ScrollView
from kivy.uix.gridlayout import GridLayout
from kivy.uix.label import Label

class MyApp(App):
    def build(self):
        scroll = ScrollView()
        layout = GridLayout(cols=1, size_hint_y=None)
        layout.bind(minimum_height=layout.setter('height'))

        for i in range(1, 4):
            lbl = Label(text=f"Item {i}", size_hint_y=None, height=40)
            layout.add_widget(lbl)

        scroll.add_widget(layout)
        return scroll

if __name__ == '__main__':
    MyApp().run()
Once you've developed your Kivy/KivyMD application, the next crucial step is packaging it into an Android APK file using Buildozer - the primary tool for converting Python applications into Android packages.It supports both declarative KV style and declarative python style.
What is Buildozer?
Buildozer is a tool that automates the entire build process for mobile applications. It handles:
- Dependency management
- Android SDK and NDK setup
- APK compilation
- Platform-specific configurations
Getting Started with Buildozer
Follow the official Buildozer documentation for installation and setup:
Recommended Tutorials
For a visual walkthrough, I recommend Dennis-Immanuel Czogalla's comprehensive tutorial:
🔄 Important Updates for 2024
Since this video was created in 2022, here are the essential updates you need to make:
Critical Package Versions
Use these specific versions to avoid compatibility issues:
# Install specific Cython version (compatible with Buildozer)
Do not upgrade and specifically use cython version 0.29, which is compatible with python-for-android package
sudo pip3 install cython==0.29.33

# Upgrade setuptools to latest version (80.9.0)
sudo pip3 install --upgrade setuptools

# Check installed versions
sudo pip3 list | grep -E "(cython|setuptools)"Java Development Kit Update
Use OpenJDK 17 instead of version 8 to avoid Gradle errors:
# Install OpenJDK 17 (instead of version 8)
sudo apt-get install openjdk-17-jdk

# Verify installation
java -version
javac -versionAdvanced: GitHub Actions for Building
For better debugging, consider using GitHub Actions:
Advantages of GitHub Actions:
- Clean build environment every time
- Detailed build logs for easier debugging
- No local resource consumption
- Better error identification compared to local Linux logs
We frequently use this approach at P> Technologies, especially when troubleshooting build issues.
GitHub Actions Tutorial
Here's an advance build_apk.yml file, to put into the .github/workflows/ repository:
name: Build Kivy APK
on:
  workflow_dispatch:
jobs:
  build:
    runs-on: ubuntu-22.04
    steps:
      - uses: actions/checkout@v4

      - name: Install system dependencies
        run: |
          sudo apt update
          sudo apt install -y git zip unzip openjdk-17-jdk python3-pip python3-virtualenv \
          autoconf libtool pkg-config zlib1g-dev libncurses5-dev libncursesw5-dev libtinfo6 cmake \
          libffi-dev libssl-dev automake autopoint gettext

          # Optional: Set Java alternatives if multiple JDKs installed
          sudo update-alternatives --set java /usr/lib/jvm/java-17-openjdk-amd64/bin/java
          sudo update-alternatives --set javac /usr/lib/jvm/java-17-openjdk-amd64/bin/javac

      - name: Setup Python environment and Buildozer
        run: |
          python3 -m pip install --upgrade pip setuptools cython==0.29.33

      - name: Build APK
        uses: digreatbrian/buildozer-action@v2
        with:
          python-version: 3.8
          buildozer-cmd: buildozer -v android debug --warning-mode all

      - name: Upload artifacts
        uses: actions/upload-artifact@v4
        with:
          name: package
          path: ./bin/*.apk
Complete Buildozer Configuration
Here's a comprehensive buildozer.spec file:
[app]

# (str) Title of your application
title = Apptitle

# (str) Package name (usually app title)
package.name = apptitle

# (str) Package domain (needed for android/ios packaging) / Your complete package name after compilation would then be com.apptitle.apptitle
package.domain = com.apptitle

# (str) Source code where the main.py live
source.dir = .

# (list) Source files to include (let empty to include all the files)
source.include_exts = py,png,jpg,jpeg,kv,ttf,txt,json

# (list) List of inclusions using pattern matching
#source.include_patterns =

# (list) Source files to exclude (let empty to not exclude anything)
#source.exclude_exts = spec

# (list) List of directory to exclude (let empty to not exclude anything)
#source.exclude_dirs = tests, bin, venv

# (list) List of exclusions using pattern matching
# Do not prefix with './'
#source.exclude_patterns = license,images/*/*.jpg

# (str) Application versioning (method 1) - Would have to get higher for each new release
version = 0.1

# (str) Application versioning (method 2)
# version.regex = __version__ = ['"](.*)['"]
# version.filename = %(source.dir)s/main.py

# (list) Application requirements
# comma separated e.g. requirements = sqlite3,kivy
# At P>, we suggest using the following ones for KivyMD apps
requirements = python3, android, kivy==2.3.0, requests, urllib3, chardet, idna, certifi, materialyoucolor, exceptiongroup, asyncgui, asynckivy, pillow, cachetools, python-dateutil, scramp, asn1crypto, cryptography, bcrypt, https://github.com/kivymd/KivyMD/archive/master.zip

# (str) Custom source folders for requirements
# Sets custom source for any requirements with recipes
# requirements.source.kivy = ../../kivy

# (str) Presplash of the application - Image displayed at loading - Must be .png ! - We suggest having images 512*512
presplash.filename = %(source.dir)s/image/img.png

# (str) Icon of the application - Icon of the app - Must be .png ! - We suggest having images 512*512
icon.filename = %(source.dir)s/image/icon.png

# (list) Supported orientations
# Valid options are: landscape, portrait, portrait-reverse or landscape-reverse
orientation = portrait

# (list) List of service to declare
#services = NAME:ENTRYPOINT_TO_PY,NAME2:ENTRYPOINT2_TO_PY

#
# OSX Specific
#

#
# author = © Copyright Info

# change the major version of python used by the app
osx.python_version = 3

# Kivy version to use
osx.kivy_version = 2.3.0

#
# Android specific
#

# (bool) Indicate if the application should be fullscreen or not
fullscreen = 0

# (string) Presplash background color (for android toolchain)
# Supported formats are: #RRGGBB #AARRGGBB or one of the following names:
# red, blue, green, black, white, gray, cyan, magenta, yellow, lightgray,
# darkgray, grey, lightgrey, darkgrey, aqua, fuchsia, lime, maroon, navy,
# olive, purple, silver, teal.
#android.presplash_color = #FFFFFF

# (string) Presplash animation using Lottie format.
# see https://lottiefiles.com/ for examples and https://airbnb.design/lottie/
# for general documentation.
# Lottie files can be created using various tools, like Adobe After Effect or Synfig.
#android.presplash_lottie = "path/to/lottie/file.json"

# (str) Adaptive icon of the application (used if Android API level is 26+ at runtime)
#icon.adaptive_foreground.filename = %(source.dir)s/data/icon_fg.png
#icon.adaptive_background.filename = %(source.dir)s/data/icon_bg.png

# (list) Permissions
# (See https://python-for-android.readthedocs.io/en/latest/buildoptions/#build-options-1 for all the supported syntaxes and properties)
# Needed for some app
#android.permissions = INTERNET,WRITE_EXTERNAL_STORAGE,READ_EXTERNAL_STORAGE

# (list) features (adds uses-feature -tags to manifest)
#android.features = android.hardware.usb.host

# (int) Target Android API, should be as high as possible - 35 is Android 15
android.api = 35

# (int) Minimum API your APK / AAB will support - 24 is the one we chose. Do not set it lower for new releases, or version of app would be lower than before
android.minapi = 24

# (int) Android SDK version to use.
android.sdk = 20

# (str) Android NDK version to use
android.ndk = 25b

# (int) Android NDK API to use. This is the minimum API your app will support, it should usually match android.minapi.
android.ndk_api = 24

# (bool) Use --private data storage (True) or --dir public storage (False)
#android.private_storage = True

# (str) Android NDK directory (if empty, it will be automatically downloaded.)
#android.ndk_path =

# (str) Android SDK directory (if empty, it will be automatically downloaded.)
#android.sdk_path =

# (str) ANT directory (if empty, it will be automatically downloaded.)
#android.ant_path =

# (bool) If True, then skip trying to update the Android sdk
# This can be useful to avoid excess Internet downloads or save time
# when an update is due and you just want to test/build your package
# android.skip_update = False

# (bool) If True, then automatically accept SDK license
# agreements. This is intended for automation only. If set to False,
# the default, you will be shown the license when first running
# buildozer.
# Usually needed to support external SDK. Leave it commented. If you get Aidl error when compiling, uncomment
#android.accept_sdk_license = True

# (str) Android entry point, default is ok for Kivy-based app
#android.entrypoint = org.kivy.android.PythonActivity

# (str) Full name including package path of the Java class that implements Android Activity
# use that parameter together with android.entrypoint to set custom Java class instead of PythonActivity
#android.activity_class_name = org.kivy.android.PythonActivity

# (str) Extra xml to write directly inside the "<manifest>" element of AndroidManifest.xml
# use that parameter to provide a filename from where to load your custom XML code
#android.extra_manifest_xml = %(source.dir)s/extramanifest.xml

# (str) Extra xml to write directly inside the "<manifest><application>" tag of AndroidManifest.xml
# use that parameter to provide a filename from where to load your custom XML arguments:
#android.extra_manifest_application_arguments = ./src/android/extra_manifest_application_arguments.xml

# (str) Full name including package path of the Java class that implements Python Service
# use that parameter to set custom Java class which extends PythonService
#android.service_class_name = org.kivy.android.PythonService

# (str) Android app theme, default is ok for Kivy-based app
# android.apptheme = "@android:style/Theme.NoTitleBar"

# (list) Pattern to whitelist for the whole project
#android.whitelist =

# (str) Path to a custom whitelist file
#android.whitelist_src =

# (str) Path to a custom blacklist file
#android.blacklist_src =

# (list) List of Java .jar files to add to the libs so that pyjnius can access
# their classes. Don't add jars that you do not need, since extra jars can slow
# down the build process. Allows wildcards matching, for example:
# OUYA-ODK/libs/*.jar
#android.add_jars = foo.jar,bar.jar,path/to/more/*.jar

# (list) List of Java files to add to the android project (can be java or a
# directory containing the files)
#android.add_src = %(source.dir)s/src/android

# (list) Android AAR archives to add
#android.add_aars =

# (list) Put these files or directories in the apk assets directory.
# Either form may be used, and assets need not be in 'source.include_exts'.
# 1) android.add_assets = source_asset_relative_path
# 2) android.add_assets = source_asset_path:destination_asset_relative_path
#android.add_assets =

# (list) Put these files or directories in the apk res directory.
# The option may be used in three ways, the value may contain one or zero ':'
# Some examples:
# 1) A file to add to resources, legal resource names contain ['a-z','0-9','_']
# android.add_resources = my_icons/all-inclusive.png:drawable/all_inclusive.png
# 2) A directory, here  'legal_icons' must contain resources of one kind
# android.add_resources = legal_icons:drawable
# 3) A directory, here 'legal_resources' must contain one or more directories,
# each of a resource kind:  drawable, xml, etc...
# android.add_resources = legal_resources
#android.add_resources =

# (list) Gradle dependencies to add
#android.gradle_dependencies =

# (bool) Enable AndroidX support. Enable when 'android.gradle_dependencies'
# contains an 'androidx' package, or any package from Kotlin source.
# android.enable_androidx requires android.api >= 28
#android.enable_androidx = True

# (list) add java compile options
# this can for example be necessary when importing certain java libraries using the 'android.gradle_dependencies' option
# see https://developer.android.com/studio/write/java8-support for further information
# android.add_compile_options = "sourceCompatibility = 1.8", "targetCompatibility = 1.8"

# (list) Gradle repositories to add {can be necessary for some android.gradle_dependencies}
# please enclose in double quotes
# e.g. android.gradle_repositories = "maven { url 'https://kotlin.bintray.com/ktor' }"
#android.add_gradle_repositories =

# (list) packaging options to add
# see https://google.github.io/android-gradle-dsl/current/com.android.build.gradle.internal.dsl.PackagingOptions.html
# can be necessary to solve conflicts in gradle_dependencies
# please enclose in double quotes
# e.g. android.add_packaging_options = "exclude 'META-INF/common.kotlin_module'", "exclude 'META-INF/*.kotlin_module'"
#android.add_packaging_options =

# (list) Java classes to add as activities to the manifest.
#android.add_activities = com.example.ExampleActivity

# (str) OUYA Console category. Should be one of GAME or APP
# If you leave this blank, OUYA support will not be enabled
#android.ouya.category = GAME

# (str) Filename of OUYA Console icon. It must be a 732x412 png image.
#android.ouya.icon.filename = %(source.dir)s/data/ouya_icon.png

# (str) XML file to include as an intent filters in "<activity>" tag
#android.manifest.intent_filters = %(source.dir)s/intent_filter.xml

# (list) Copy these files to src/main/res/xml/ (used for example with intent-filters)
#android.res_xml = PATH_TO_FILE,

# (str) launchMode to set for the main activity
#android.manifest.launch_mode = standard

# (str) screenOrientation to set for the main activity.
# Valid values can be found at https://developer.android.com/guide/topics/manifest/activity-element
#android.manifest.orientation = fullSensor

# (list) Android additional libraries to copy into libs/armeabi
#android.add_libs_armeabi = libs/android/*.so
#android.add_libs_armeabi_v7a = libs/android-v7/*.so
#android.add_libs_arm64_v8a = libs/android-v8/*.so
#android.add_libs_x86 = libs/android-x86/*.so
#android.add_libs_mips = libs/android-mips/*.so

# (bool) Indicate whether the screen should stay on
# Don't forget to add the WAKE_LOCK permission if you set this to True
#android.wakelock = False

# (list) Android application meta-data to set (key=value format)
#android.meta_data =

# (list) Android library project to add (will be added in the
# project.properties automatically.)
#android.library_references =

# (list) Android shared libraries which will be added to AndroidManifest.xml using "<uses-library>" tag
#android.uses_library =

# (str) Android logcat filters to use
#android.logcat_filters = *:S python:D

# (bool) Android logcat only display log for activity's pid
#android.logcat_pid_only = False

# (str) Android additional adb arguments
#android.adb_args = -H host.docker.internal

# (bool) Copy library instead of making a libpymodules.so
#android.copy_libs = 1

# (list) The Android archs to build for, choices: armeabi-v7a, arm64-v8a, x86, x86_64
# In past, was `android.arch` as we weren't supporting builds for multiple archs at the same time.
android.archs = arm64-v8a, armeabi-v7a

# (int) overrides automatic versionCode computation (used in build.gradle)
# this is not the same as app version and should only be edited if you know what you're doing
# android.numeric_version = 1

# (bool) enables Android auto backup feature (Android API >=23)
android.allow_backup = True

# (str) XML file for custom backup rules (see official auto backup documentation)
# android.backup_rules =

# (str) If you need to insert variables into your AndroidManifest.xml file,
# you can do so with the manifestPlaceholders property.
# This property takes a map of key-value pairs. (via a string)
# Usage example : android.manifest_placeholders = [myCustomUrl:\"org.kivy.customurl\"]
# android.manifest_placeholders = [:]

# (bool) Skip byte compile for .py files
# android.no-byte-compile-python = False

# (str) The format used to package the app for release mode (aab or apk or aar) - For Google play store, switch to aab
android.release_artifact = apk

# (str) The format used to package the app for debug mode (apk or aar).
android.debug_artifact = apk

#
# Python for android (p4a) specific
#

# (str) python-for-android URL to use for checkout
#p4a.url =

# (str) python-for-android fork to use in case if p4a.url is not specified, defaults to upstream (kivy)
#p4a.fork = kivy

# (str) python-for-android branch to use, defaults to master.
p4a.branch = master

# (str) python-for-android specific commit to use, defaults to HEAD, must be within p4a.branch
#p4a.commit = HEAD

# (str) python-for-android git clone directory (if empty, it will be automatically cloned from github)
#p4a.source_dir =

# (str) The directory in which python-for-android should look for your own build recipes (if any)
#p4a.local_recipes =

# (str) Filename to the hook for p4a
#p4a.hook = psycopg2_ndk

# (str) Bootstrap to use for android builds
# p4a.bootstrap = sdl2

# (int) port number to specify an explicit --port= p4a argument (eg for bootstrap flask)
#p4a.port =

# Control passing the --use-setup-py vs --ignore-setup-py to p4a
# "in the future" --use-setup-py is going to be the default behaviour in p4a, right now it is not
# Setting this to false will pass --ignore-setup-py, true will pass --use-setup-py
# NOTE: this is general setuptools integration, having pyproject.toml is enough, no need to generate
# setup.py if you're using Poetry, but you need to add "toml" to source.include_exts.
#p4a.setup_py = false

# (str) extra command line arguments to pass when invoking pythonforandroid.toolchain
#p4a.extra_args =


#
# iOS specific
#

# (str) Path to a custom kivy-ios folder
#ios.kivy_ios_dir = ../kivy-ios
# Alternately, specify the URL and branch of a git checkout:
ios.kivy_ios_url = https://github.com/kivy/kivy-ios
ios.kivy_ios_branch = master

# Another platform dependency: ios-deploy
# Uncomment to use a custom checkout
#ios.ios_deploy_dir = ../ios_deploy
# Or specify URL and branch
ios.ios_deploy_url = https://github.com/phonegap/ios-deploy
ios.ios_deploy_branch = 1.10.0

# (bool) Whether or not to sign the code
ios.codesign.allowed = false

# (str) Name of the certificate to use for signing the debug version
# Get a list of available identities: buildozer ios list_identities
#ios.codesign.debug = "iPhone Developer: "

# (str) The development team to use for signing the debug version
#ios.codesign.development_team.debug =

# (str) Name of the certificate to use for signing the release version
#ios.codesign.release = %(ios.codesign.debug)s

# (str) The development team to use for signing the release version
#ios.codesign.development_team.release =

# (str) URL pointing to .ipa file to be installed
# This option should be defined along with `display_image_url` and `full_size_image_url` options.
#ios.manifest.app_url =

# (str) URL pointing to an icon (57x57px) to be displayed during download
# This option should be defined along with `app_url` and `full_size_image_url` options.
#ios.manifest.display_image_url =

# (str) URL pointing to a large icon (512x512px) to be used by iTunes
# This option should be defined along with `app_url` and `display_image_url` options.
#ios.manifest.full_size_image_url =


[buildozer]

# (int) Log level (0 = error only, 1 = info, 2 = debug (with command output))
log_level = 2

# (int) Display warning if buildozer is run as root (0 = False, 1 = True)
warn_on_root = 1

# (str) Path to build artifact storage, absolute or relative to spec file
# build_dir = ./.buildozer

# (str) Path to build output (i.e. .apk, .aab, .ipa) storage
# bin_dir = ./bin

#    -----------------------------------------------------------------------------
#    List as sections
#
#    You can define all the "list" as [section:key].
#    Each line will be considered as a option to the list.
#    Let's take [app] / source.exclude_patterns.
#    Instead of doing:
#
#[app]
#source.exclude_patterns = license,data/audio/*.wav,data/images/original/*
#
#    This can be translated into:
#
#[app:source.exclude_patterns]
#license
#data/audio/*.wav
#data/images/original/*
#


#    -----------------------------------------------------------------------------
#    Profiles
#
#    You can extend section / key with a profile
#    For example, you want to deploy a demo version of your application without
#    HD content. You could first change the title to add "(demo)" in the name
#    and extend the excluded directories to remove the HD content.
#
#[app@demo]
#title = My Application (demo)
#
#[app:source.exclude_patterns@demo]
#images/hd/*
#
#    Then, invoke the command line with the "demo" profile:
#
#buildozer --profile demo android debug
Testing Your APK
You've successfully built an .apk file! Now it's time to test it thoroughly before publishing.
Cloud Testing with Appetize.io
Visit Appetize.ioAppetize.io is a cloud-based platform that allows you to test your Android APK directly in a web browser. It's perfect for quick testing and debugging without needing physical devices.
Instant Testing
Upload your APK and test immediately in the browser
Debug Logs
Access real-time console logs for error identification
Multiple Devices
Test on various Android versions and screen sizes
Free Tier
Generous free plan for individual developers
How to Use Appetize.io:
Create Account
Sign up at appetize.io - the free tier is sufficient for most testing needs
Upload APK
Drag and drop your .apk file or select it from your computer
Configure Settings
Choose device type, Android version, and orientation
Test & Debug
Interact with your app and monitor the debug console for errors
Appetize.io Interface Overview

Upload your APK file directly to the platform
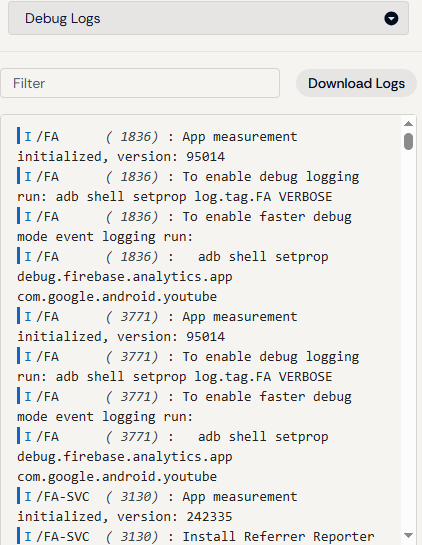
Real-time debug console for error tracking
Real Device Testing
While cloud testing is convenient, nothing replaces testing on actual Android devices. Real devices reveal performance issues, touch responsiveness problems, and device-specific bugs that emulators might miss.
Why Test on Real Devices:
- Accurate Performance: Real CPU, GPU, and memory usage
- Hardware Integration: Camera, GPS, sensors work authentically
- Touch Experience: Real multi-touch and gesture testing
- Network Conditions: Real-world connectivity scenarios
- Battery Impact: Actual power consumption measurement
Installing APK on Android Devices:
Enable Unknown Sources
Go to Settings → Security → Unknown sources and enable installation from unknown sources
Transfer APK to Device
Transfer the .apk file to your device via:
- USB cable and file transfer
- Cloud storage (Google Drive, Dropbox)
- Email attachment
- Direct download
Install the APK
Use a file manager app to locate and tap on the .apk file, then follow the installation prompts
Test Thoroughly
Test all app features, including:
- User interface and navigation
- All buttons and interactions
- Network-dependent features
- Hardware features (if applicable)
- App lifecycle (minimize, restore, close)
Play Store Internal Testing
Once your app is uploaded to the Play Store, you can leverage Google's built-in testing tracks for comprehensive testing before public release. This provides the most realistic testing environment as users install your app directly from the Play Store.
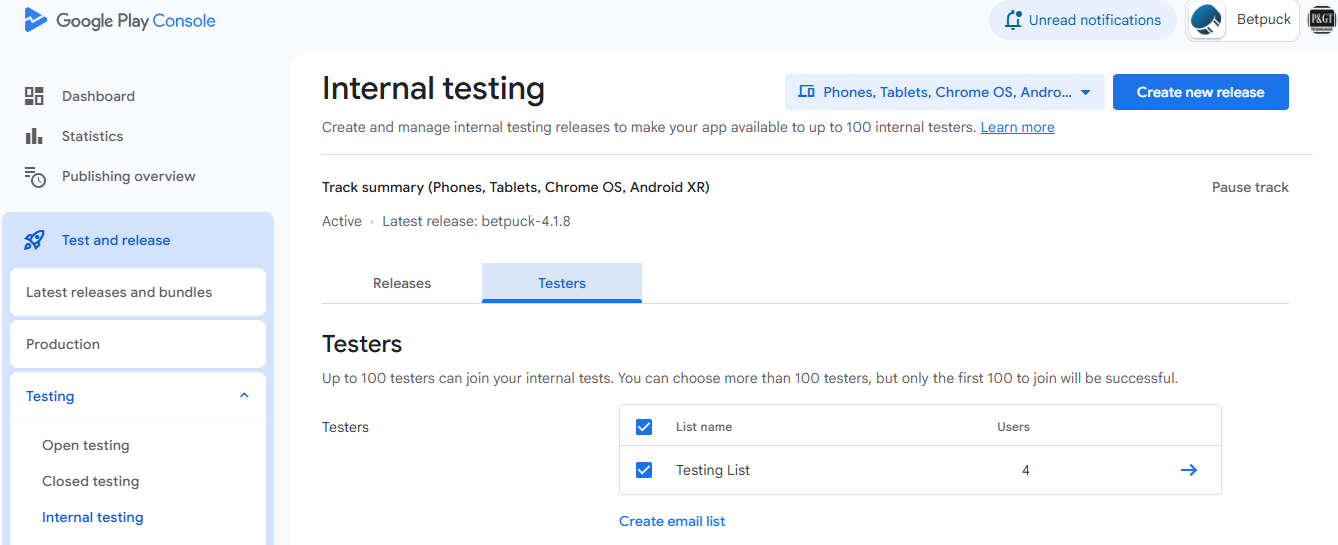
Google Play Console Internal Testing interface
Recommended Testing Strategy
Cloud Test
Start with Appetize.io for initial functionality check
Primary Device
Test on your main development device. Either by uploading the .apk or through PlayStore internal testing
Multiple Devices
Test on different screen sizes and Android versions
Essential Testing Checklist:
Publishing to Google Play Store

Generating Your App Bundle
Google Play no longer accepts APK files for new apps. You must use Android App Bundles (AAB) for publishing. The good news is Buildozer handles this seamlessly!
Converting your APK build to an App Bundle requires just one simple configuration change in your buildozer.spec file.
Configuration Update:
Find Release Artifact
Look for the line: android.release_artifact = apk
Change to AAB
Update the line to: android.release_artifact = aab
Rebuild Your App
Run buildozer android release to generate the new AAB file
Updated buildozer.spec Configuration:
[app]
		# Your existing app configuration...
		title = My Amazing App
		package.name = myapp
		package.domain = com.example

		# ... other configurations ...

		#
		# Android specific
		#

		# (str) The format used to package the app for release mode (aab or apk or aar)
		# For Google Play Store, use 'aab'
		android.release_artifact = aab

		# (str) The format used to package the app for debug mode (apk or aar)
		android.debug_artifact = apk

		# ... rest of your configuration ...
Sign Your App Bundle
Google requires your release to be digitally signed. This creates an upload key certificate that Play Store uses to verify your app's authenticity and ensure updates come from the original developer.
Method 1: Manual Signing (Without Android Studio)
This method uses command-line tools to generate and apply your signing key.
Create Keystore Directory
First, create a dedicated directory for your keystore files:
mkdir -p ~/keystores/Generate Keystore
Create a new keystore using the keytool command:
keytool -genkey -v -keystore ~/keystores/<your-new-key>.keystore -alias <your-key-alias> -keyalg RSA -keysize 2048 -validity 10000<your-new-key> and <your-key-alias>
Export variables
$ export P4A_RELEASE_KEYSTORE=~/keystores/<your-new-key>.keystore
$ export P4A_RELEASE_KEYSTORE_PASSWD=<your-keystore-password>
$ export P4A_RELEASE_KEYALIAS_PASSWD=<your-key-alias-password>
$ export P4A_RELEASE_KEYALIAS=<your-key-alias>Launch buildozer in release mode
Your AAB will be signed automatically
keytool -printcert -jarfile your_app.aabVerify Signature
Check that your AAB is properly signed:
keytool -printcert -jarfile your_app.aabMethod 2: Using Android Studio
Android Studio provides a graphical interface for generating and managing signing keys.
Generate Keystore in Android Studio
Follow these steps in Android Studio:
- Go to Build → Generate Signed Bundle / APK
- Select "Android App Bundle" and click Next
- Click "Create new..." under "Key store path"
- Fill in the required information:
- Key store path: Choose location for your .jks file
- Password: Create strong keystore password
- Alias: Name for your key (e.g., "upload_key")
- Password: Create strong key password
- Validity: 25 years recommended (9125 days)
- Certificate: Fill in your developer information
Build Signed AAB
Complete the signing process in Android Studio:
- Select "Release" build variant
- Choose signature versions: V1 (Jar Signature) and V2 (Full APK Signature)
- Click "Finish" to generate your signed AAB
Alternative: Command Line Signing
If you have a .jks file, you can sign your AAB using apksigner:
apksigner sign --ks my-release-key.jks --min-sdk-version 22 --v1-signing-enabled true --v2-signing-enabled true release_signed.aab🔐 Critical Security Information
Create Your Company
Google requires developers to have a registered business entity to publish apps on the Play Store. You'll need to create a company and obtain a D-U-N-S number for your Google Play Console account setup.
Obtain D-U-N-S Number
Once your company is registered, obtain your free D-U-N-S number:
🌐 D-U-N-S Number Registration
Visit the official D&B website to register your business:
Public Developer Information
Your company information will be publicly visible on the Play Store:
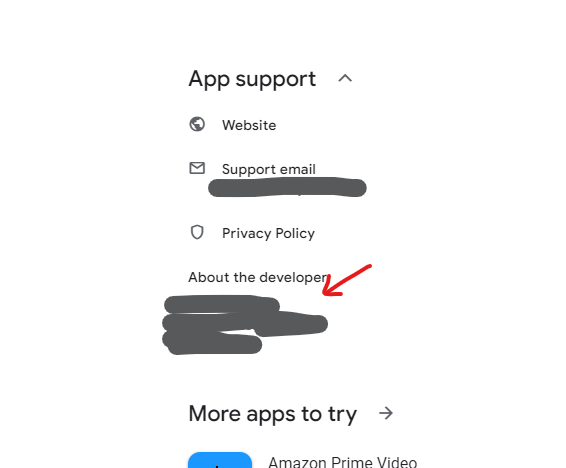
Example of public developer information displayed on Play Store
Create Professional Presence
Google requires a website and privacy policy for your apps. Follow these steps to establish your professional online presence.
Domain Name
Your professional web address
Business Email
Professional communication
Privacy Policy
Required for app submission
Recommended Tutorials by Victor Oyedeji:
Build your professional website using GitHub Pages & Vercel
Complete guide to creating a free professional website
Setting Up Google Play Console
Before you can upload your app, you need a Google Play Developer account. This involves a one-time registration fee and some basic setup.
What You'll Need:
- Google Account: Regular Gmail account
- Developer Fee: One-time $25 payment
- DUNS number:
- Company content Email and website
- Developer Name: This will be publicly visible (can be your company name)
- Contact Information: Email for developer communications (we suggest professionnal email)
Account Setup Process:
Visit Play Console
Go to play.google.com/console and sign in with your Google account
Pay Developer Fee
Complete the registration and pay the one-time $25 developer fee
Complete Profile
Fill in your developer information and accept the developer agreement
Create Your First App
Click "Create app" and enter your app's basic information
Google Play Console Interface:
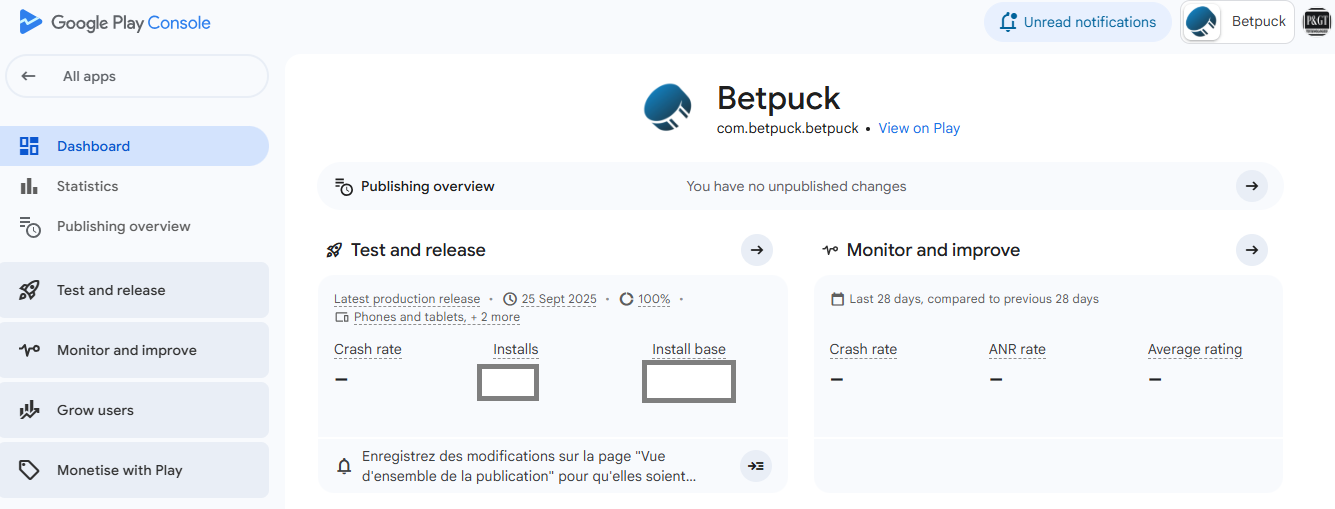
Play Console dashboard after account setup
Uploading Your App Bundle
Once your Play Console account is set up and you have your AAB file, you're ready to upload your app to the Play Store.
Upload Process:
Prepare Store Listing
Before uploading, prepare your app's store listing including:
- App title and description
- Screenshots (multiple sizes)
- App icon (512x512 PNG)
- Feature graphic (1024x500 PNG)
- Privacy policy URL (if required)
Create Test Release
In Play Console, go to Test and release → Testing →Internal Testing → Create new release
Upload AAB File
Drag and drop your AAB file or browse to select it from your computer
Review and Rollout
Complete the release notes, review all information, and start the rollout
Upload Tips & Best Practices:
Quality Screenshots
Include screenshots for phone, 7-inch tablet, and 10-inch tablet
Clear Description
Write a compelling description that explains your app's value
Appropriate Categories
Choose relevant categories and tags for better discoverability
Testing Your App in Play Store
Before releasing your app to the public, Google Play provides powerful testing tracks to identify and fix issues. Follow this progressive testing strategy to ensure a smooth launch.
Progressive Testing Strategy
Internal Testing
Quick iterations with your team
Closed Testing
Larger group of trusted testers
Open Testing
Public testing with wider audience
Production
Public release to all users
Step 1: Internal Testing
Quick Iterations with Your Team
Internal testing is designed for rapid development cycles with up to 100 testers. This is your first line of defense against bugs.
Fast Updates
No Google review required
100 Testers
Team members and close friends
Quick Debugging
Identify critical issues early
🚀 Internal Testing Benefits
- No review process - Updates available to testers in hours
- Perfect for development - Test new features quickly
- Private - Only invited testers can access
- Unlimited versions - Upload as many builds as needed
Step 2: Closed Testing
Expand to Trusted Testers
Once internal testing is stable, move to closed testing with a larger group of up to 2,000 testers.
Controlled Access
Invite-only testing
Larger Sample
Up to 2,000 testers
Google Review
App goes through review process
Step 3: Open Testing
Public Testing Phase
Open testing allows anyone to join and test your app, providing valuable feedback from a diverse user base.
Public Access
Anyone can join testing
Real Feedback
Diverse user opinions
Store Presence
Public store listing
Testing Completion Checklist
Before promoting to production, ensure all these areas are thoroughly tested:
Monetize your App with Google AdMob
Now that your app is published, you can start thinking about implementing ads. While advertising is one monetization strategy, it's important to consider all options for your app's revenue model.
App Monetization Strategies
Before diving into AdMob, understand the broader monetization landscape. Advertising is just one way to generate revenue from your app.
Google AdMob Ad Formats
AdMob offers several ad formats with different revenue potential and user experience impacts. Choose the right mix for your app.
| Ad Format | Average eCPM (USD) | Description & Profitability | User Experience Impact | KivMob Compatibility |
|---|---|---|---|---|
| Rewarded Video | $10 - $15 (up to $50 in some contexts) |
Most profitable format. Users watch videos in exchange for in-app rewards. Highly engaging. | Very Positive: Voluntary and appreciated, increases retention | Fully Supported |
| Interstitial | $4 - $10 | Full-screen ads placed at natural transitions. High user attention, good click-through rate. | Can be intrusive if misused, use in moderation | Fully Supported |
| App Open Ads | From $7 (up to +30% ARPU boost) |
Full-screen ads shown when opening the app. Increases revenue without disturbing users too much. | Relatively neutral, well integrated, minimally intrusive | Not Supported |
| Native Ads | $2 - $6 | Ads integrated into content. Less intrusive, effective in social/lifestyle/news apps. | Minimally intrusive, good user experience | Not Supported |
| Banner Ads | $0.5 - $1.5 | Ads visible at top/bottom of screen. Low engagement, limited but stable revenue with sufficient traffic. | Low impact, unengaging, often ignored ("banner blindness") | Fully Supported |
Implementing Ads with KivMob (Updated Method)
For Kivy and KivyMD apps, AdMob integration requires custom Java callbacks. The traditional KivMob approach needs updates for current AdMob APIs. Here's the working solution:
Step 1: Project Structure Setup
Create Source Directory Structure
Set up the following folder structure in your project:
your_project/
├── main.py
├── main.kv (if needed)
├── kivmob_mod.py
├── buildozer.spec
└── src/
    └── org/
        └── yourdomain/
            └── yourappname/
                ├── InterstitialAdLoadCallback4kivy.java
└── RewardedAdLoadCallback4kivy.javaorg.yourdomain.yourappname with your actual package name from buildozer.spec
Step 2: Add Custom Java Callback Files
Interstitial Ad Callback
Create InterstitialAdLoadCallback4kivy.java:
package org.yourdomain.yourappname;

import android.util.Log;
import androidx.annotation.NonNull;
import com.google.android.gms.ads.LoadAdError;
import com.google.android.gms.ads.interstitial.InterstitialAd;
import com.google.android.gms.ads.interstitial.InterstitialAdLoadCallback;
import com.google.android.gms.ads.FullScreenContentCallback;
import com.google.android.gms.ads.AdError;

public class InterstitialAdLoadCallback4kivy extends InterstitialAdLoadCallback {

    private static final String TAG = "InterstitialAdLoadCallback4kivy";
    private InterstitialAd mInterstitialAd;

    @Override
    public void onAdLoaded(@NonNull InterstitialAd interstitialAd) {
        mInterstitialAd = interstitialAd;
        Log.d(TAG, "Interstitial Ad loaded.");

        mInterstitialAd.setFullScreenContentCallback(new FullScreenContentCallback(){
            @Override
            public void onAdClicked() {
              Log.d(TAG, "Interstitial Ad was clicked.");
            }

            @Override
            public void onAdDismissedFullScreenContent() {
              Log.d(TAG, "Interstitial Ad dismissed fullscreen content.");
              mInterstitialAd = null;
            }

            @Override
            public void onAdFailedToShowFullScreenContent(AdError adError) {
              Log.e(TAG, "Interstitial Ad failed to show fullscreen content.");
              mInterstitialAd = null;
            }

            @Override
            public void onAdImpression() {
              Log.d(TAG, "Interstitial Ad recorded an impression.");
            }

            @Override
            public void onAdShowedFullScreenContent() {
              Log.d(TAG, "Interstitial Ad showed fullscreen content.");
            }
          });
    }

    @Override
    public void onAdFailedToLoad(@NonNull LoadAdError loadAdError) {
        Log.d(TAG, "Failed to load Interstitial ad: " + loadAdError.getMessage());
        mInterstitialAd = null;
    }
}Rewarded Ad Callback
Create RewardedAdLoadCallback4kivy.java:
package org.yourdomain.yourappname;

import android.util.Log;
import androidx.annotation.NonNull;
import com.google.android.gms.ads.LoadAdError;
import com.google.android.gms.ads.rewarded.RewardedAd;
import com.google.android.gms.ads.rewarded.RewardedAdLoadCallback;
import com.google.android.gms.ads.FullScreenContentCallback;
import com.google.android.gms.ads.AdError;

public class RewardedAdLoadCallback4kivy extends RewardedAdLoadCallback {

    private static final String TAG = "RewardedAdLoadCallback4kivy";
    private RewardedAd mRewardedAd;

    @Override
    public void onAdLoaded(@NonNull RewardedAd rewardedAd) {
        mRewardedAd = rewardedAd;
        Log.d(TAG, "Rewarded Ad was loaded.");
        mRewardedAd.setFullScreenContentCallback(new FullScreenContentCallback() {
            @Override
            public void onAdClicked() {
              Log.d(TAG, "Rewarded Ad was clicked.");
            }

             @Override
            public void onAdDismissedFullScreenContent() {
              Log.d(TAG, "Rewarded Ad dismissed fullscreen content.");
              mRewardedAd = null;
            }

            @Override
            public void onAdFailedToShowFullScreenContent(AdError adError) {
              Log.e(TAG, "Rewarded Ad failed to show fullscreen content.");
              mRewardedAd = null;
            }

            @Override
            public void onAdImpression() {
              Log.d(TAG, "Rewarded Ad recorded an impression.");
            }

            @Override
            public void onAdShowedFullScreenContent() {
              Log.d(TAG, "Rewarded Ad showed fullscreen content.");
            }
          });
    }

    @Override
    public void onAdFailedToLoad(@NonNull LoadAdError loadAdError) {
        Log.d(TAG, loadAdError.toString());
        mRewardedAd = null;
    }
}org.yourdomain.yourappname with your actual package name from buildozer.spec
Step 3: Update Buildozer Configuration
Modify buildozer.spec
Add these essential configurations to your buildozer.spec file:
# Permissions for AdMob
android.permissions = INTERNET, ACCESS_NETWORK_STATE

# Add Java source files
android.add_src = ./src

# Gradle dependencies for AdMob
android.gradle_dependencies = com.google.android.gms:play-services-ads:24.3.0, androidx.appcompat:appcompat:1.7.1, androidx.activity:activity:1.10.1

# Enable AndroidX
android.enable_androidx = True

# Test AdMob application ID (replace with yours later)
android.meta_data = com.google.android.gms.ads.APPLICATION_ID=ca-app-pub-3940256099942544~3347511713
🔧 Buildozer Configuration Notes
- Permissions: INTERNET and ACCESS_NETWORK_STATE are required for ads
- Source Files: Points to your custom Java callback files
- Gradle Dependencies: Latest AdMob SDK and AndroidX compatibility
- Application ID: Use test ID during development, replace with real ID for production
Step 4: Python Implementation
Basic AdMob Implementation in Python
Use KivMob in your main Python file:
from kivmob import KivMob
from kivy.app import App
from kivy.utils import platform
from kivy.logger import Logger
if platform == 'android':
    from kivmob_mod import KivMob, TestIds, RewardedListenerInterface

# Real Ad Unit IDs (for production - replace with yours)
REAL_APP_ID = "ca-app-pub-XXXXXXXXXXXXXXXX~REPLACE_WITH_REAL_ID"
REAL_BANNER_ID = "ca-app-pub-XXXXXXXXXXXXXXXX/REPLACE_WITH_REAL_ID"
REAL_INTERSTITIAL_ID = "ca-app-pub-XXXXXXXXXXXXXXXX/REPLACE_WITH_REAL_ID"
REAL_REWARDED_ID = "ca-app-pub-XXXXXXXXXXXXXXXX/REPLACE_WITH_REAL_ID"

class RewardsHandler(RewardedListenerInterface):
    def on_rewarded(self, reward_type, reward_amount):
        print("User rewarded", "Type; ", reward_type, "Amount; ", reward_amount)
        #load rewarded_ads
        App.get_running_app().ads.load_rewarded_ad(TestIds.REWARDED_VIDEO)

class AdMobApp(App):
    def build(self):
        # Initialize KivMob with Test App ID (use REAL_APP_ID for production)
        self.ads = KivMob(TestIds.APP)
        # self.ads = KivMob(REAL_APP_ID)  # Uncomment for production

        # Setup banner ad
        self.ads.new_banner(TestIds.BANNER, top_pos=False)
        # self.ads.new_banner(REAL_BANNER_ID, top_pos=False)  # Uncomment for production

        # Setup interstitial ad
        self.ads.new_interstitial(TestIds.INTERSTITIAL)
        # self.ads.new_interstitial(REAL_INTERSTITIAL_ID)  # Uncomment for production

        # Setup rewarded ad with listener
        self.ads.new_rewarded_ad(TestIds.REWARDED_VIDEO)
        # self.ads.new_rewarded_ad(REAL_REWARDED_ID)  # Uncomment for production
        self.ads.set_rewarded_ad_listener(RewardsHandler())

    def on_start(self):
        """Called when the app starts"""
        if platform == 'android':
            Logger.info("AdMobApp: Loading ads on app start")
            self.load_ads()

    def load_ads(self):
        """Load all ads"""
        if platform == 'android':
            Logger.info("AdMobApp: Loading all ads")

            # Load banner
            self.ads.request_banner()
            self.ads.show_banner()  # Show banner immediately or hide initially

            # Load interstitial
            self.ads.load_interstitial()

            # Load rewarded ad
            self.ads.load_rewarded_ad()

    def show_banner(self):
        """Show banner ad"""
        if platform == 'android':
            Logger.info("AdMobApp: Showing banner")
            self.ads.show_banner()

    def hide_banner(self):
        """Hide banner ad"""
        if platform == 'android':
            Logger.info("AdMobApp: Hiding banner")
            self.ads.hide_banner()

    def load_interstitial(self):
        """Load interstitial ad"""
        if platform == 'android':
            Logger.info("AdMobApp: Loading interstitial")
            self.ads.load_interstitial()

    def show_interstitial(self):
        """Show interstitial ad"""
        if platform == 'android':
            Logger.info("AdMobApp: Showing interstitial")
            self.ads.show_interstitial()

    def load_rewarded_ad(self):
        """Load rewarded ad"""
        if platform == 'android':
            Logger.info("AdMobApp: Loading rewarded ad")
            self.ads.load_rewarded_ad()

    def show_rewarded_ad(self):
        """Show rewarded ad"""
        if platform == 'android':
            Logger.info("AdMobApp: Showing rewarded ad")
            self.ads.show_rewarded_ad()

if __name__ == '__main__':
AdMobApp().run()Create AdMob Account
Before implementing ads in your app, you need to set up your AdMob account and create ad units. This process will give you the App ID and Ad Unit IDs needed for your Python code and buildozer.spec file.
Step 1: Create AdMob Account
Sign Up for AdMob
Visit the AdMob website and create your account:
- Use the same Google account as your Play Console
- Complete the registration process
- Accept the AdMob terms and conditions
Add Your App to AdMob
Connect your published Play Store app to AdMob:
- Click "Add app" in your AdMob dashboard
- Select "Yes, it's listed on a supported app store"
- Search for and select your published app
- Follow the setup wizard
Find Your App ID
After adding your app, AdMob will generate a unique App ID:
Format
ca-app-pub-xxxxxxxxxxxxxxxx~yyyyyyyyyy
buildozer.spec
Used in Android metadata
Python Code
Used in KivMob initialization
Where to find it: In your AdMob dashboard, go to your app → App settings → App ID
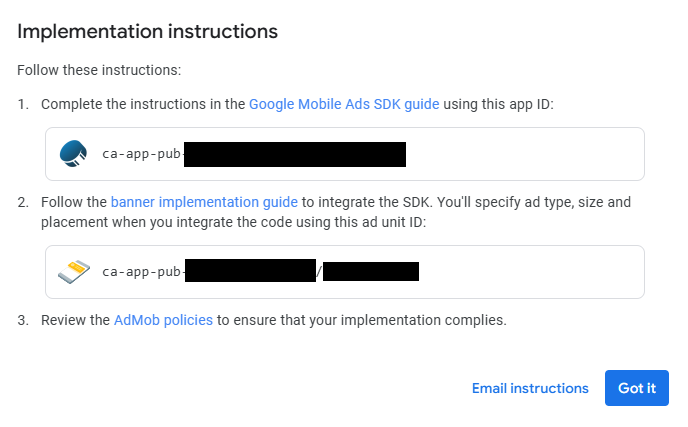
Locating your App ID in the AdMob dashboard
# Replace test ID with your real App ID
android.meta_data = com.google.android.gms.ads.APPLICATION_ID=ca-app-pub-XXXXXXXXXXXXXXXX~XXXXXXXXXX# Replace test ID with your real App ID
REAL_APP_ID = "ca-app-pub-XXXXXXXXXXXXXXXX~XXXXXXXXXX"
# In your app initialization
self.ads = KivMob(REAL_APP_ID)Step 3: Create Ad Units
Create ad units for each type of ad you want to display in your app.
Create Banner Ad Unit
Set up a banner ad unit for your app:
- In AdMob, go to your app → Ad units
- Click "Create ad unit"
- Select "Banner"
- Name it (e.g., "Main Banner")
- Configure ad size (recommended: Smart Banner)
- Click "Create ad unit"
- After creation, copy your Banner Ad Unit ID:
# Replace test ID with your real Banner Ad Unit ID
REAL_BANNER_ID = "ca-app-pub-XXXXXXXXXXXXXXXX/XXXXXXXXXX"

# In your banner setup
self.ads.new_banner(REAL_BANNER_ID, top_pos=False)Create Interstitial Ad Unit
Set up an interstitial ad unit:
- Click "Create ad unit" again
- Select "Interstitial"
- Name it (e.g., "Main Interstitial")
- Click "Create ad unit"
# Replace test ID with your real Interstitial Ad Unit ID
REAL_INTERSTITIAL_ID = "ca-app-pub-ca-app-pub-XXXXXXXXXXXXXXXX/XXXXXXXXXX"

# In your interstitial setup
self.ads.new_interstitial(REAL_INTERSTITIAL_ID)Create Rewarded Ad Unit
Set up a rewarded ad unit:
- Click "Create ad unit"
- Select "Rewarded"
- Name it (e.g., "Video Rewards")
- Configure reward amount and type
- Click "Create ad unit"
# Replace test ID with your real Rewarded Ad Unit ID
REAL_REWARDED_ID = "ca-app-pub-ca-app-pub-XXXXXXXXXXXXXXXX/XXXXXXXXXX"

# In your rewarded ad setup
self.ads.new_rewarded_ad(REAL_REWARDED_ID)Congratulations! 🎉
You've successfully completed the comprehensive journey from Python code to a fully monetized Android app on the Google Play Store !